This is a project I worked on in my free time during my freshman year of university back in the 2015-2016 school year. I remember I saw someone create this arcade control box which housed a Raspberry Pi, and ran a video game emulator. The box then connected to a monitor and you could play with it. I believe I also saw kits where you could pay for the materials and such and follow simple instructions to make it. However, I wanted to use the skills I had just learned that Fall in my ENGR 101 class, and make use of the facilities I now had access to.
Software
While I was researching, I found the emulator that ran on the RPi: RetroPie. All I had to do was install it onto a micro SD card like I would an OS, and it would work. Later, I found out that I would need to install some sort of utility from an Adafruit guide that I was using to help. The utility made it so that the GPIO pins on the RPi would be read as certain keyboard keys. That way, RetroPie could be configured to use the GPIO pins as controls.
Hardware
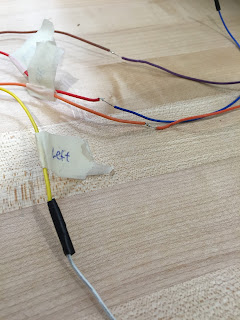
I first bought an arcade joystick, and 4 coloured arcade buttons from Adafruit, and researched into how to connect it to the RPi (RPi 2, model B.) The wiring was pretty straight forward: each direction from the joystick and each button connected to a different GPIO pin. Furthermore, I later used 2 smaller red momentary switches as a "start" and "select" button wired in the same manner.
The Journey
Once I had the main buttons and the joystick, I remember I hastily wanted to put it all together, but I hadn't created an actual "box" yet. Suddenly, I had one of my more memorable, and possibly even the first, engineering "a-ha!" moment.
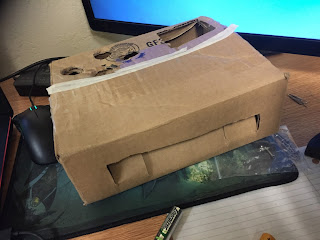
Arcade Box Mk. I
I grabbed a nearby box, and crudely cut holes that would snugly hold the 4 buttons and the joystick, and a hole in the side to be able to externally wire the buttons to GPIO pins. If you look at the breadboard closely, I used 2 breadboard sized momentary buttons as the "start" and "select" buttons. It was a very momentous occasion for me. Here are some more photos I have of back then:
Picture I took to admire my soldering
Couple of pictures of just the box
I realized that doing things like making the arcade box was what I wanted to do: start with an idea, try to make it, and learn along the way (basically what engineering is.) Although functioning, I wanted this all to look and feel better.
In my ENGR 101 class, we were introduced to Solidworks, a 3D modeling software that we could use to design something that we want to build, and then use it with a laser cutter that would cut out our design from a piece of wood. So, since this was free for me, I used it.
Laser cut box before assembly
Laser cut box after assembly
In the latter picture, you can see no "start" or "select" button yet, and that the joystick is actually fitted with screws into the box, it's simply taped to the box. The next couple of photos are ones that I have taken today (March 31, 2018) of the last model of the box I had made.
Top View (can see 'start' and 'select' buttons in center)
Inside View
Side View (can see latch, and opening for RPi's HDMI, USB, etc.)
Front Panel
Along the years, I have lost the door that is supposed to be the wall to the left of the joystick, but it was always a bit rickety anyways. If you look at the "inside view", you can see a tiny screw and nut at the bottom left, near the RPi opening. I had 2 diagonally placed holes so I could fix the naked RPi board into the box. Also, I made the 4 arcade buttons the same colour and layout as that of Nintendo's Famicon controller as a bit of an easter egg.
Conclusion
The arcade box basically opened my eyes as to what I could now do with the resources given to me, and all that's needed is my own drive to create. This box was dated April 8, 2016, and we're now coming up on 2 years since I've made it.
I still would like to revisit my old files of the 3D model of the box and fix the joystick as it still is basically being held together with tape. The joystick can be sort of unscrewed with its metal plate so that only the "joystick" bit will actually be external to the box, and for some reason, I could never get the measurements right or something. The holes for the screws were too wide at one point, and in this one the hole is like "too big" for the joystick. It was weird, and I'd like to revisit it so everything looks nice. Also, the holes for the buttons were too tight, and the bits of plastic that made the buttons secure once fitted into the rigid holes broke off, so they are currently being held in place by blue sticky tack: my go-to adhesive for things like this.
This first, self-driven project set off, as corny as it sounds, a sort of spark within me. It started this attitude I began to develop of looking at things I could buy, but asking myself, "Why don't I just make it?"
Adafruit guide (contains utility used for GPIO pins)


No comments:
Post a Comment